12x20 Shed with Loft Plans: Expert Tips and Advice
Constructing a 12x20 shed with a loft represents a significant undertaking, demanding careful planning and execution to ensure a structurally sound and aesthetically pleasing result. This comprehensive guide provides expert tips and advice, covering all aspects from initial design considerations to final finishing touches. Proper planning is crucial for a successful project, minimizing potential errors and maximizing the utility of your finished structure.
I. Planning and Design Considerations
Before breaking ground, meticulous planning is paramount. This phase dictates the success of your project and ensures you achieve your desired outcome within budget and timeframe constraints.
A. Site Selection and Preparation
The location of your shed significantly impacts its usability and longevity. Choose a level, well-drained area with easy access for construction materials and future use. Consider proximity to power sources if you intend to utilize electricity within the shed. Thorough site preparation, including clearing vegetation and leveling the ground, is essential for a stable foundation.
B. Shed Design and Functionality
Determine the primary function of your shed. Will it serve as storage, a workshop, or a combination? This dictates the internal layout and required features. A detailed floor plan is crucial, specifying the location of doors, windows, shelving, and the loft access. Consider incorporating features like workbenches, electrical outlets, and adequate lighting based on intended use.
C. Building Codes and Permits
Familiarize yourself with local building codes and zoning regulations. These regulations may dictate aspects such as shed size, height, materials, and setbacks from property lines. Obtain the necessary permits before commencing construction; failure to do so can result in fines or demolition orders. Consult with your local building department to clarify any uncertainties.
D. Material Selection and Budget
The choice of materials significantly impacts both the cost and durability of your shed. Pressure-treated lumber is commonly used for its resistance to rot and insects. Consider using metal roofing for its longevity and low maintenance requirements. Develop a comprehensive budget encompassing all materials, tools, and potential labor costs. Allow for a contingency fund to address unforeseen expenses.
II. Foundation and Framing
A robust foundation and precise framing are the cornerstones of a stable and long-lasting shed. Careful attention to detail in these phases prevents future structural problems.
A. Foundation Options
Several foundation options are available, each with its advantages and disadvantages:
- Concrete Slab: Provides a solid, level base, ideal for heavier sheds and those with lofts. However, it is more expensive and labor-intensive.
- Gravel Base: A cost-effective option for well-drained soil. Requires a layer of compacted gravel followed by a pressure-treated lumber floor frame.
- Concrete Pier Blocks: Suitable for uneven terrain. Individual concrete blocks support the framing, allowing for adjustment to level the structure.
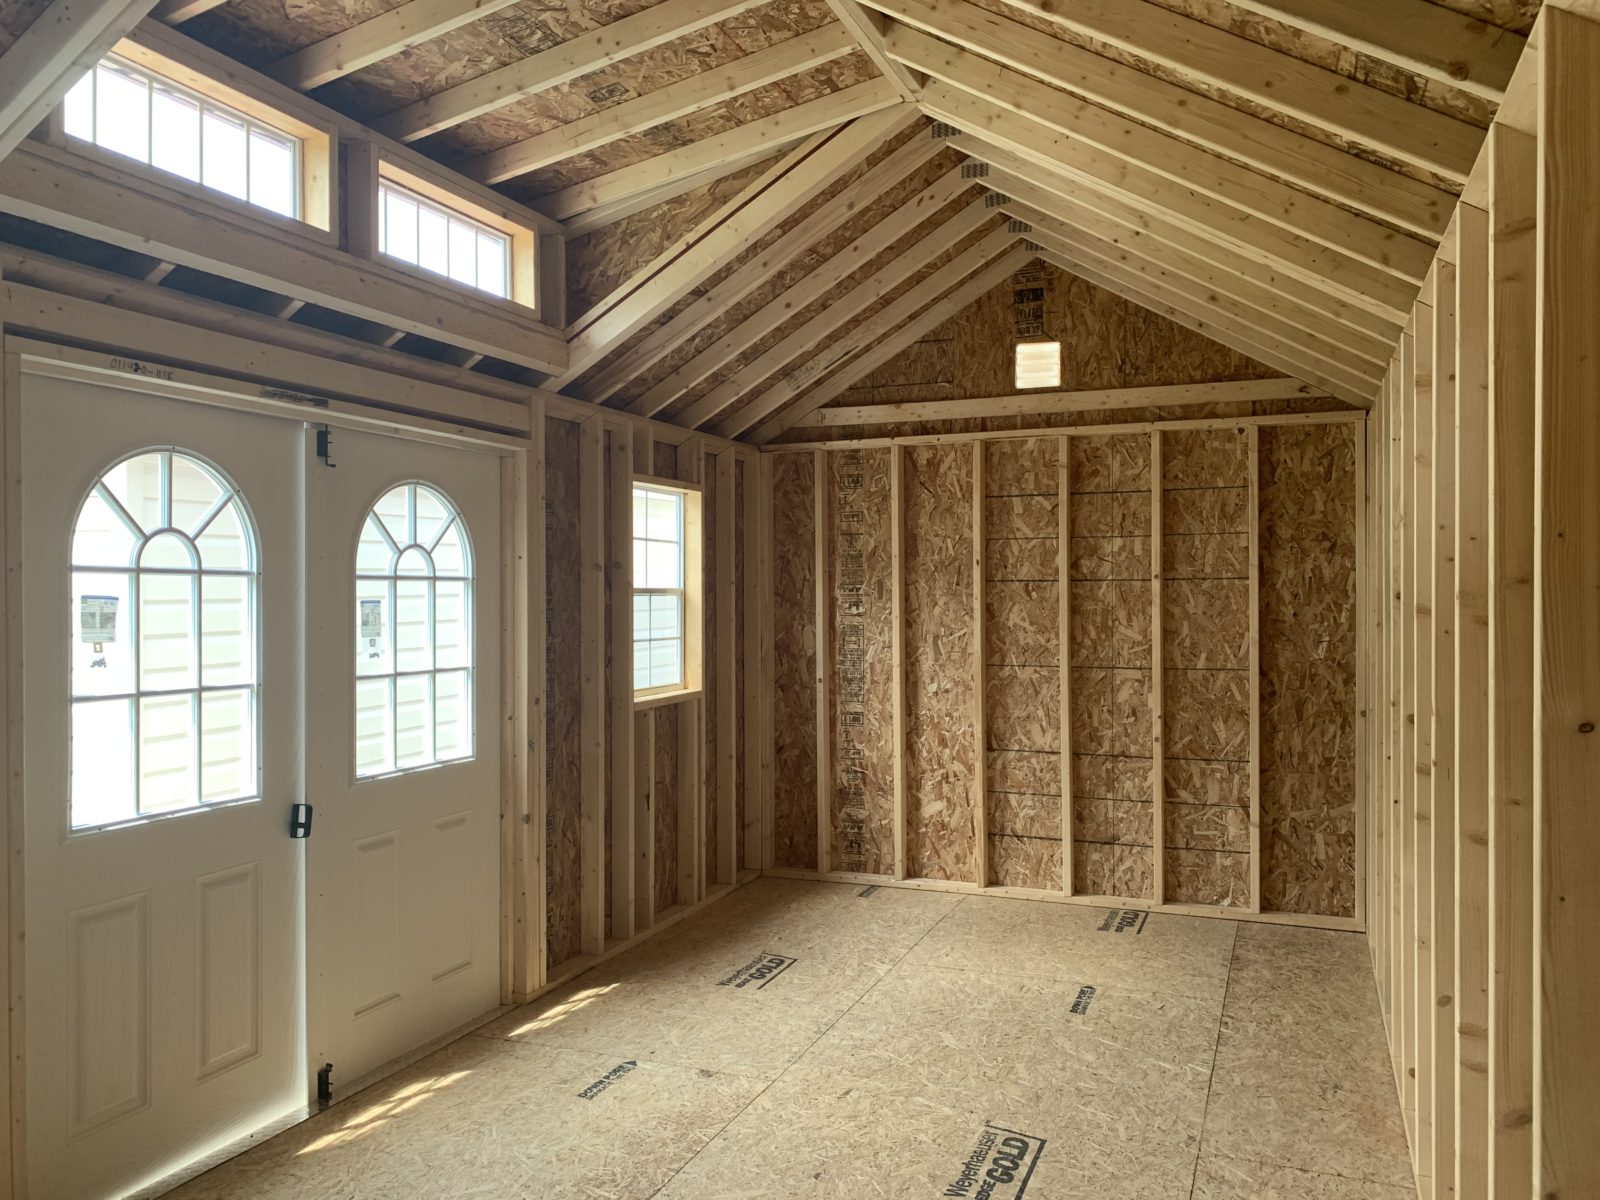
B. Framing the Walls and Roof
Accurate framing is crucial for structural integrity. Utilize properly sized lumber according to local building codes and your design plans. Ensure walls are plumb and square, using a level and square to verify measurements at each stage. Properly brace the walls during construction to maintain their shape and prevent warping. Employ appropriate techniques for framing the roof, considering the slope and type of roofing material chosen.
C. Loft Framing and Support
The loft structure requires careful planning and execution. Ensure adequate support beams and joists are in place to handle the anticipated weight. Consider using engineered lumber for greater strength and span capability. The loft access should be carefully designed for safety and ease of use, perhaps incorporating a staircase or sturdy ladder.
III. Exterior and Interior Finishing
The finishing stages transform the basic structure into a functional and aesthetically pleasing shed. Attention to detail during these phases enhances the overall quality and lifespan of the building.
A. Exterior Cladding and Roofing
Install exterior cladding that is both durable and aesthetically pleasing. Consider vinyl siding, wood siding, or metal panels depending on your budget and aesthetic preferences. Properly install the roofing material according to the manufacturer's instructions, ensuring adequate ventilation to prevent moisture buildup. Install gutters and downspouts to direct rainwater away from the foundation.
B. Interior Finishing and Insulation
If you intend to use the shed year-round or for temperature-sensitive activities, proper insulation is critical. Consider using appropriate insulation materials within the walls and ceiling. Install drywall or other suitable interior wall covering for a clean and finished look. Paint or stain the interior walls and trim to complete the aesthetic.
C. Electrical and Plumbing (Optional)
If incorporating electrical or plumbing within the shed, consult with qualified professionals to ensure compliance with relevant codes and safety regulations. Properly ground all electrical wiring and install appropriate circuit breakers and GFCI outlets. Plumbing installations require careful planning and execution to avoid leaks and damage.
IV. Safety Precautions and Best Practices
Safety should be a paramount concern throughout the entire construction process. Following best practices minimizes the risk of injury and ensures a successful outcome.
A. Tool Safety and Personal Protective Equipment (PPE)
Always use appropriate safety equipment, including safety glasses, hearing protection, work gloves, and sturdy footwear. Maintain tools in good working order and follow the manufacturer's instructions for safe operation. Be aware of potential hazards associated with power tools and machinery.
B. Structural Integrity and Inspections
Regularly inspect the structure for any signs of instability or damage during construction. Use a level and square to verify measurements and ensure components are correctly aligned. Address any issues promptly to prevent significant problems later.
C. Weather Considerations
Be mindful of weather conditions and postpone work if necessary. Protect materials from rain, snow, and excessive sun exposure. Ensure adequate ventilation during the construction process to prevent moisture buildup.
By carefully following these tips and advice, you can successfully construct a durable, functional, and aesthetically pleasing 12x20 shed with a loft. Remember that thorough planning, precise execution, and attention to detail are essential for a successful outcome. Consult with qualified professionals if needed to ensure compliance with local building codes and safety regulations.


0 comments:
Post a Comment
Note: Only a member of this blog may post a comment.