How to Make a Small Pallet Shed: A Simple Project for Your Yard
Constructing a small shed from reclaimed pallets offers a budget-friendly and environmentally conscious solution for additional storage space in your yard. This project, while achievable for DIY enthusiasts with basic carpentry skills, requires careful planning and execution to ensure structural integrity and longevity. This comprehensive guide details each stage of the process, from material selection to final finishing, enabling you to build a functional and aesthetically pleasing pallet shed.
I. Planning and Preparation: Laying the Foundation for Success
The success of any construction project hinges on meticulous planning. Before commencing the construction of your pallet shed, several crucial steps must be undertaken to ensure a smooth and efficient building process. These preparatory steps will not only streamline the construction but also contribute to the overall quality and longevity of the finished structure.
A. Determining Shed Dimensions and Location
The initial step involves determining the desired dimensions of your shed. Consider the amount of storage space required and the available yard space. Accurate measurements are critical to ensure the pallets fit correctly and the shed meets your storage needs. Sketch a detailed plan, including dimensions, door placement, and any desired windows. Selecting an appropriate location is equally important. Ensure the site is level, has adequate drainage, and complies with any local building regulations or homeowner association guidelines. Consider factors such as sunlight exposure and proximity to other structures.
B. Sourcing and Assessing Pallets
The heart of this project lies in the pallets themselves. Sourcing high-quality, sturdy pallets is paramount. Inspect each pallet carefully for signs of rot, insect infestation, or significant damage. Choose pallets of consistent size and material; this will simplify construction and improve the overall aesthetic appeal. Ideally, pallets made of heat-treated wood (HT) are preferable, as they are less likely to contain harmful pests or chemicals. Ensure you acquire enough pallets to meet the dimensions of your planned shed. It is advisable to have a few extra pallets on hand to account for potential damage or unforeseen adjustments during construction.
C. Gathering Necessary Tools and Materials
Before you begin, compile a comprehensive list of necessary tools and materials. This will prevent delays and interruptions during the construction process. Essential tools include: a hammer, various sized nails or screws, a measuring tape, a level, a saw (circular saw or hand saw), a drill, safety glasses, work gloves, and possibly a pry bar for dismantling stubborn pallets. Materials will include: the reclaimed pallets, additional lumber for supports and framing (if needed), screws or nails, wood preservative or sealant, roofing material (e.g., corrugated metal sheets, asphalt shingles), and possibly hinges, a latch, and paint or stain for finishing.
II. Construction: Assembling Your Pallet Shed
With meticulous planning complete, the construction phase can commence. This stage requires careful attention to detail and adherence to safe working practices. Remember to prioritize safety by wearing appropriate protective gear throughout the entire process.
A. Foundation Preparation
Although a basic pallet shed may not require a complex foundation, preparing a level base is crucial for stability. Consider using compacted gravel or concrete pavers to create a level surface. This will prevent the shed from settling unevenly and ensure longevity. The foundation should be slightly larger than the base of your shed to provide adequate support.
B. Assembling the Frame
Begin assembling the shed frame by carefully laying out the pallets according to your pre-determined plan. Interlocking the pallets is generally the easiest and most secure approach. You may need to use additional lumber for support and reinforcement, particularly for the corners and any load-bearing points. Ensure the frame is square and level at each stage of construction, using your level and measuring tape for accuracy. Secure the pallets firmly with screws or nails, ensuring sufficient penetration for a strong bond.
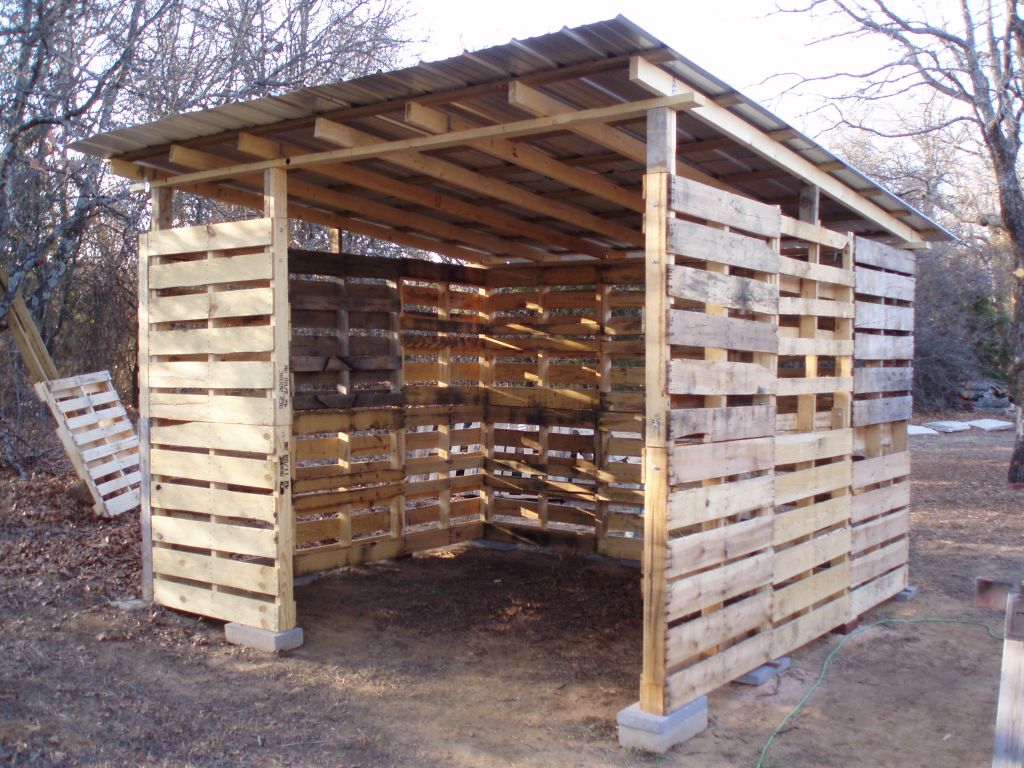
C. Adding Walls and Roof
Once the base frame is securely in place, begin adding the remaining pallets to create the walls. Again, ensure proper alignment and secure fastening. The roof structure is equally crucial. Depending on the size and design, you may need to construct a separate roof frame using additional lumber before adding roofing material. Consider the weight of the roofing material when designing the roof support structure. Choose a durable and weather-resistant roofing material, such as corrugated metal or asphalt shingles, to protect the contents of your shed from the elements. Ensure proper sealing to prevent leaks.
D. Door and Window Installation
Incorporate the door and any windows into the design at this stage. You can create a simple door by using additional pallets or purchasing a pre-made door of appropriate size. Securely attach the door hinges and a latch mechanism. Windows can be created by cutting out sections of pallets or purchasing pre-made windows. Ensure adequate sealing around doors and windows to prevent drafts and water ingress.
III. Finishing Touches: Enhancing Aesthetics and Durability
With the basic structure complete, focus on enhancing the aesthetics and durability of your pallet shed. These final steps will protect your investment and enhance the overall curb appeal.
A. Treating and Sealing the Wood
Applying a wood preservative or sealant is crucial for protecting the pallets from the elements and extending the lifespan of your shed. This will help prevent rot, insect infestation, and weathering. Choose a high-quality product suitable for outdoor use. Apply multiple coats, allowing each coat to dry completely before applying the next.
B. Painting or Staining
Consider painting or staining your pallet shed to enhance its appearance and provide additional protection. This will not only improve the aesthetics but also offer further protection against weathering. Select a paint or stain designed for outdoor use and apply according to the manufacturer's instructions.
C. Final Inspections and Adjustments
Before deeming the project complete, conduct a thorough inspection. Check for any loose nails or screws, any gaps or cracks that need attention, and ensure the door and windows function correctly. Make any necessary adjustments or repairs to ensure the structural integrity and functionality of the shed.
Building a small pallet shed is a rewarding project that combines practicality with environmental consciousness. By carefully following these steps and prioritizing safety and attention to detail, you can create a functional and aesthetically pleasing storage solution for your yard.


0 comments:
Post a Comment
Note: Only a member of this blog may post a comment.